
In this process, the optical path taken by the laser is a fixed path controlled by the lens. However, when the machine has been working for a long time, the light path will slightly deviate. When the deviation is serious, the copper nozzle may not be able to emit light, which affects the cutting effect. Therefore, daily inspection and adjustment of the optical path of the machine are very necessary.
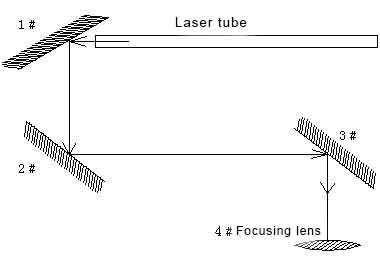
(2)Adjustment of the second optical path
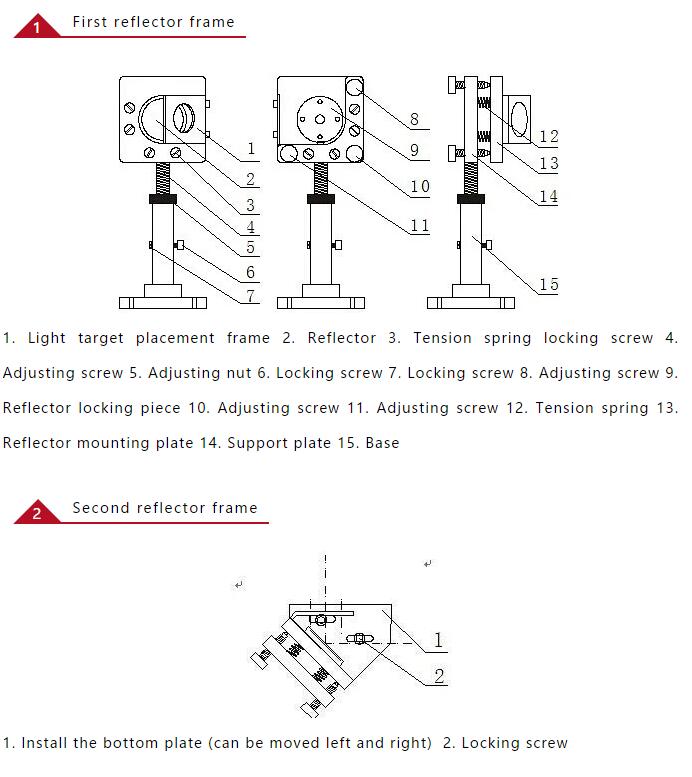
Use dimming paper to stick to the target hole of the second reflector, move the second reflector from near to far, and then manually press the “Pulse” button , so that the near and far spots are in the same position, and the optical path is parallel to the X-axis rail. The optical path adjustment is completed.
(3)Adjustment of the third optical path
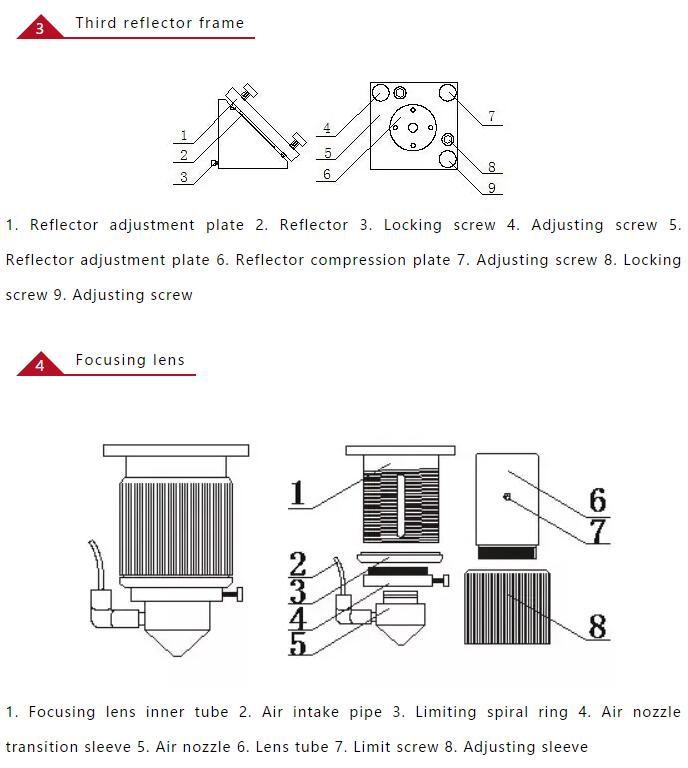
Use dimming paper to stick to the target hole of the third reflector, move the third reflector from near to far, and then manually press the “Pulse” button, so that the near and far spots are in the same position, and the optical path is parallel to the X-axis rail. The optical path adjustment is completed.
(4)Adjustment of the fourth optical path
Use transparent tape to stick to the light exit, so that the light hole leaves a circular mark on the adhesive tape, press the “Pulse” button. After that, remove the adhesive tape to observe the position of the small hole, if not in the center, adjust the third reflector’s screws according to the situation until the spot is round and positive.
Through the demo video below, we can understand the steps of optical path adjustment more intuitively.
If you are still in doubt during the use of the machine, you can leave a message or call +86-769-26384404, we will be happy to help you!